Fostering Food Security Through Collaboration

By Sustainable Solano

Food insecurity is a big challenge in Solano County, where 13.7% of residents don’t have a stable food supply, compared with 11.6% for the state, according to Solano Public Health. In recent months, Sustainable Solano has been in conversation with organizations that are taking the initiative to move food from farms and gardens onto the plates of county residents. These organizations are seeking ways to collaborate toward supplying more people with the good food they need.

Sustainable Solano strives to build community around immediate personal connection, and an emphasis on healthy local food that provides greater food security and resilience is an important part of that connection. Our current food system doesn’t support this vision, which is why we applaud the efforts of organizations that are supporting ways to give on a personal level to people in need.

In the coming months, we hope to bring you more resources to share in the community and how you can get involved.
Images courtesy of Solano Land Trust

From Fair to Food

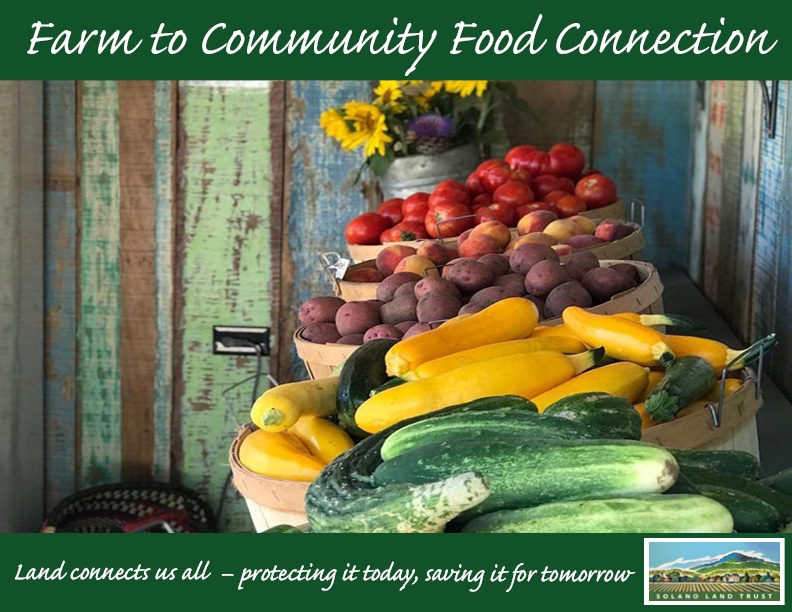
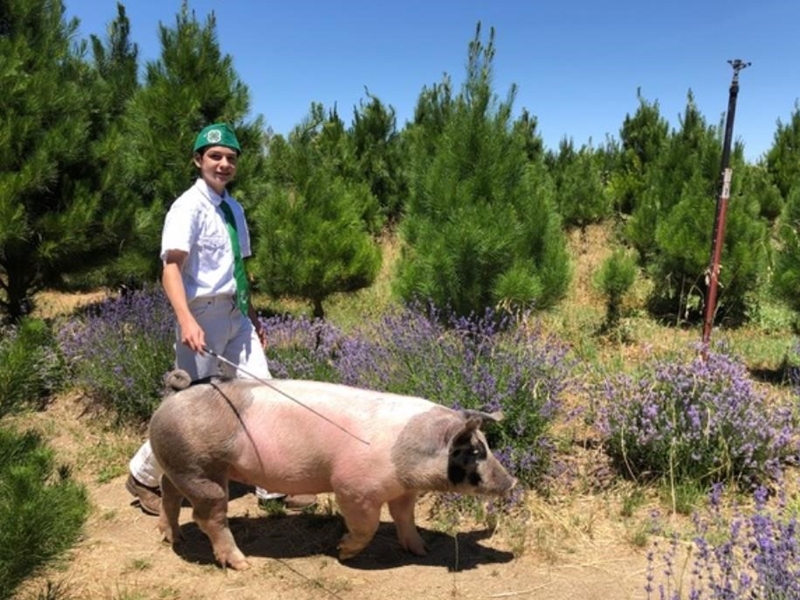
Solano Land Trust is known for its work preserving agricultural land and open space around Solano County, but the organization has recently expanded its efforts to include a farm-to-community food connection. It started when the COVID-19 restrictions canceled the Dixon May Fair and moved the Solano County Fair from a large public event to an online virtual event this year. While the livestock auctions for the fairs were able to transition to an online bid process, Solano Land Trust officials wanted to support the kids. The organization was able to purchase a steer and two pigs this year, coordinate the difficult task of processing those animals, and deliver the meat to the Food Bank of Contra Costa and Solano County.

The food bank reports increased food insecurity as a result of COVID-19. Even before the pandemic, an estimated 43,650 people did not have access to enough nutritious food in the county. The number is expected to grow by 23,690 people this year due to the effects of the pandemic, the Solano Land Trust and food bank report.

Solano Land Trust is finding other ways to distribute food to those in need. The organization has supplied more than 1,000 tomato, squash, melon, pepper and eggplant starts donated by Morningsun Herb Farm to the food bank and other community food distribution organizations. Solano Land Trust also has been collecting restricted donations used to purchase more than 3,600 pounds of produce from local farms. So far, the organization has bought produce from Eatwell Farm, Tenbrink Farms and Fully Belly Farms. The purchased food is then donated through the food bank and distributed through the mobile food pharmacy, which focuses on getting fresh produce to people whose doctors have prescribed that they eat healthy.

Learn more and donate to the Solano Land Trust’s Farm to Community Food Connection program here.

Images courtesy of Food is Free Solano

Food. For Free

Food is Free Solano has grown in leaps from when Heather Pierini started with a small stand in her front yard to distribute extra produce (Heather is one of Sustainable Solano’s Food Forest Keepers and recently expanded her garden so she could offer more to her community members). Since starting with that one stand and seeing the need for food in her community, Heather started coordinating other permanent and pop-up stands as Food is Free Benicia. Next thing we knew, she was arranging the donation and distribution of 4,000 gallons of milk! She has since changed the name to Food is Free Solano to reflect the wider scope of her vision. Working with local nonprofit WAHEO, she has been able to arrange distribution of food boxes through the USDA’s Farmers to Families food box program. So far, Food is Free Solano has distributed over 90,000 pounds of produce and 8,000 gallons of milk. Heather’s also been involved in promoting gleaning of fruit trees through starting the Solano Gleaning Initiative, with distribution through the Food is Free Solano stands.

Learn more about Food is Free Solano and Heather’s work and donate here.
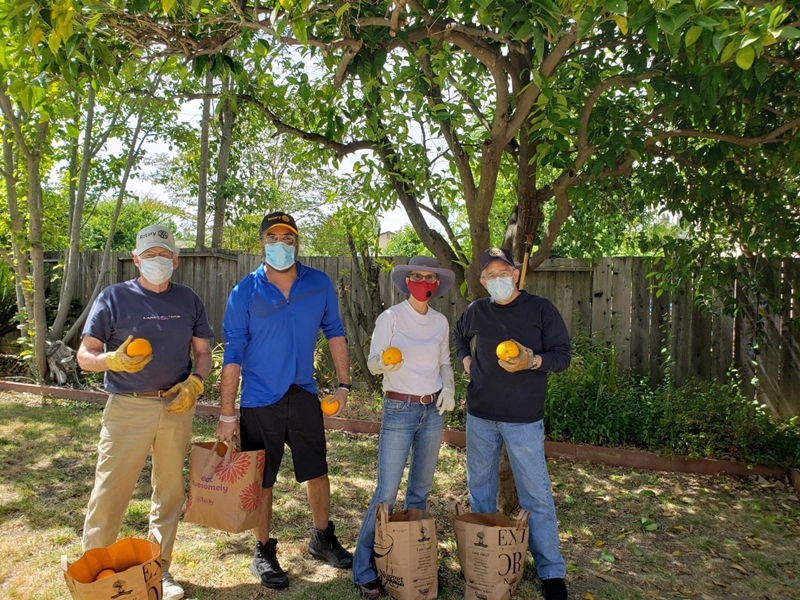
Image courtesy of Fairfield-Suisun Rotary Club
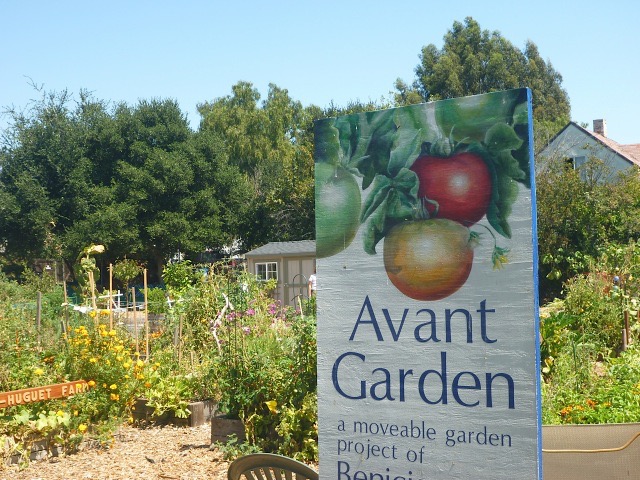
Sustainable Solano’s Avant Garden in Benicia

Gleaning Gets Going

Gleaning is gaining legs as people are looking for more sources of food that have been only sporadically utilized in Solano County. The Fairfield-Suisun Rotary Club saw the need for fresh produce among those receiving food assistance and identified gleaning as a way to serve that need. Through the new Rotary Feeds Families program, Rotary Club volunteers turn out to pick the fruit and then deliver it to the food bank or Meals on Wheels.

Learn more about the Rotary Club’s gleaning efforts here, and contact Kimber Smith if you have fruit to harvest. You can reach her at  kimbersmith2010@gmail.com or 707-333-9830.

The next step in gleaning will be creating more coordination between the organizations that are offering gleaning services around the county and community food distribution organizations. This is an area Sustainable Solano hopes to support in the future in cooperation with the Solano Land Trust, the Rotary Club and Food is Free Solano.

Toward Greater Collaboration

Our dedication to sharing food within communities stretches back to the establishment of Sustainable Solano’s very first community garden in Benicia 21 years ago. Our community gardens have “share plots” that grow food for giving, and many of the community gardeners and food forest keepers we work with also give food as their gardens grow in abundance. Already this year, Avant Garden in downtown Benicia has donated around 130 pounds of squash, zucchini and peppers to organizations like Food is Free Solano and CAC. Many of the small to medium-sized local farms we work with offer opportunities to purchase donated boxes of produce through their Community Supported Agriculture programs, creating ways to support local farms and provide food for people who need it. All of these efforts are important, and we are excited about working with other organizations to coordinate all of our efforts toward the common goal of sharing more food with neighbors in various ways.

Learn more about Sustainable Solano’s work and donate here or contact us at info@sustainablesolano.org

If you or your organization is interested in joining these efforts, please reach out to us at info@sustainablesolano.org

You can find more local food resources here on our site, and more food access support and resources on our COVID-19/Community Resilience Resources page here.

Regrow Your Own Vegetables From Kitchen Scraps

By Mallory Traughber, Living Classroom

We had a large turnout for Mallory Traughber’s talk on how to regrow vegetables and save seeds from kitchen scraps, and there were plenty of questions beyond those she answered during the class. Mallory provided a variety of resources and even a tutorial on how to make your own newspaper seed pots. Mallory was kind enough to answer some additional questions in this blog. You can watch her talk in the video here and read her responses to your questions below.

Find the handouts from Mallory’s talk and more plant resources here.

Thank you all for tuning into the webinar last month. It was wonderful to chat with you and answer your questions about regrowing vegetables from kitchen scraps! More great questions came in through the chat box after the talk so we wanted to make sure we answer a few more here regarding transplanting your vegetables from a container of water to soil, more specifics on regrowing particular vegetables, and questions about starting seeds. 

Regarding Transplanting: Some folks were curious about leaving the vegetables they are regrowing in water or transplanting them to soil. I recommend transplanting the following vegetables to soil as a more permanent location — scallions, celery, bok choy, and all of the herbs we discussed (chives, cilantro, basil, mint, and parsley). This will save you from having to remember to change out the containers of water every other day and it gives the vegetables a chance to thrive in a lasting location. However I would keep the romaine lettuce in water since you are only going to get one “harvest” from it.

Getting specific on Regrowing: A question came in about regrowing a celery stalk that is starting to go limp. There is a trick to keeping your celery nice and crisp and that is keeping it hydrated! Wrap the stalk tightly in aluminum foil so moisture cannot escape. If it’s already going limp, you can revive it by soaking it in cool water for a few hours. Once you’ve revived the limp celery stalk, be sure to regrow the end! New shoots will appear after several days. It can be transplanted to your garden to grow a new stalk over the course of a few months.

Another question came through wondering if lemongrass could also be regrown using these methods. Lemongrass is a wonderfully fragrant herb and after you have used the top, you can regrow the leaves. Place the stem of the lemongrass into a clear glass with enough water to cover the roots. Place the glass in a sunny window and replace the water at least every other day. After the lemongrass re-shoots new leaves, you can plant it out in your garden.

More questions came in regarding regrowing lettuce. Romaine lettuce works best for this experiment but you can certainly try a head of lettuce. Once roots grow from the stump, new leaves will begin to form. You are going to get all you can out of it after 10-12 days — definitely not a new head of lettuce but enough to top a sandwich or two!

Folks were curious about regrowing garlic. A method I like to use is placing the cloves of garlic in a cup (in a sunny window) root side down, with a little water on the bottom. I change the water everyday. In about a week, the cloves will start to sprout at the top and grow roots on the bottom. Now I’m ready to transplant them into the soil. I plant them 6 inches apart in good potting soil with drainage. They should be watered every time the top inch of soil dries out. Growing garlic is a game of patience as they won’t be ready to harvest for 6-9 months, however the cloves will MULTIPLY in the ground, forming new bulbs!

Finally let’s address some of your questions on starting seeds you are collecting in your kitchen. One participant wanted to know if cucumber seeds should be saved using the same methods we demonstrated for tomatoes. You can certainly give this a try, however avoid using seeds from cucumbers labeled “hybrid” as they are often sterile. You would want to let the cucumber seeds ferment in warm water for a few days so the gel coat that surrounds the seed will be removed.

We talked about growing lemon seeds from organic lemons, and how the seeds should be rinsed of all sugars and then planted while moist. A participant wanted to know how long it would take to produce a lemon in this way. It truly depends on a variety of factors, it could take anywhere from 3-10 years, or it may never produce fruit as seeds are not always dependable. The health of the seedling depends on its location, the amount of sunlight it receives, the amount of  water it receives, if it’s growing indoors/outdoors, etc.

You can also grow an avocado at home from the pit. You will remove and clean the pit, and then identify the ‘top’ and ‘down’ ends (the top is where it will sprout and will be pointier and the bottom is where the roots will grow and will be flatter).  Pierce the pit with 3 toothpicks and place it half submerged in a cup of water, bottom side in the water. Change the water regularly to prevent fungal growth, and once the sprout has grown to about 6 inches long, you can transplant it to soil. This may take anywhere from 2-8 weeks. The more sun, the better for your avocado plant! This plant may never produce fruit, and if it does it may not be quality produce, however it is a lovely (and free!) houseplant to grow.

Thank you all again for your wonderful questions, for your beet recipes, and your courageousness to try new methods for making the most out of your produce. Always remember, “There are no mistakes in gardening, only experiments!”

Enjoy the talk? Take this survey to help us determine future sustainable landscaping classes.

The Solano Sustainable Backyards program and the talk are generously funded by the Solano County Water Agency.

Edible Landscapes: A Food Forest Garden

By Derek Downey, permaculture designer

Derek Downey, owner of Whole System Designs in Davis, designed the Pollinators Paradise demonstration food forest garden in Dixon (you can watch the process evolve and learn about the elements of a food forest garden in this series of videos). He then joined Sustainable Solano’s Food Forest Keepers and other interested participants to discuss food forests and answer their questions. There wasn’t enough time to answer all of the questions during the talk, so Derek was kind enough to answer the questions in this blog. You can watch Derek’s talk in the video here and read his responses to your questions below.

Watch the Elements of a Food Forest Garden video series and find more resources here!

Learn more about Derek and Whole System Designs here

How do you protect your plants from high winds?

Properly stake your young trees using one or two stakes per tree with ties that are loosely tied to allow movement and proper taper development of tree. For protecting smaller fragile plants you can be creative using stakes/burlap screens if a hedge is not in place.

If you have a large area, consider planting a windbreak hedge using some of the plants listed here. Make sure the plant can handle your USDA and Sunset Zone and is not invasive for your area. Your windbreak can include multi-function plants such as nitrogen fixers, food producers, pollinator support, fencing material and so on.

For general suggestions for fruit tree plantings, I suggest this link, which has a great picture of fruit tree planting (including what goes in hole versus soil around hole).

How can we learn to make a maintenance plan for our garden?

This is an important question and wise to consider before starting!

Consider what are the daily and seasonal tasks that need to be done for all the various elements of your food forest. Can you design your elements in garden in a way to avoid unnecessary maintenance later on?

I recommend getting a calendar and breaking your comprehensive maintenance plan into various categories and seasons and go from there. For example, you will want maintenance plans for fertility management, harvesting, irrigation, drainage, pruning, weeding, plant disease prevention and treatment, and ongoing plantings. Maintenance activities will vary depending on the seasons, for example, winter pruning vs. summer pruning.

Which of the food layers should you start with?

It depends! That is the permaculture answer to almost any question as context is key (such as your existing trees/plants, climate, soil, sun/shade, etc.). You will definitely want to focus on creating a plan before investing a lot of time and money in installing long-term trees and perennials, not to mention irrigation infrastructure and drainage systems. Check out this great write-up on steps towards establishing a food forest.

If I already created a general design for my food forest, I would start off my installation plan with the larger elements to get them started and then fill in the gaps with understory plantings. In the early years of a food forest, the perennials will be small, so you can get away with growing annual vegetables/flowers in the extra space in between, and as perennials and canopy filled in you will have less space for the annuals. if you have existing fruit trees/canopy trees established already, you can design the understory plantings (shrubs, herbs, perennials, groundcovers, fungi) and install these elements normally based on mature size.

Birds/squirrels got all the berries. Anything besides netting or just letting them have it?

Netting is definitely helpful if you are thorough with it. Another approach is to install a motion activated sprinkler such as these.

Additional Resources

Here are some online resources that will help Food Forest Keepers:

Mushrooms:

Global Inventory of Perennial Plants PDFHere is a link to website version and more from the creator of this resource: http://www.perennialsolutions.org/a-global-inventory-of-perennial-vegetables
Here is an Online Nursery of perennial vegetables, based in Humboldt County: https://www.rollingrivernursery.com/component/virtuemart/perennial-vegetables-and-herbs/perennial-vegetables

Fruit Trees
Here’s a excellent resource regarding planting a fruit tree guild: https://www.tenthacrefarm.com/how-to-
build-a-fruit-tree-guild/ 

Soldier Fly Bin/Bio Pod
My Soldier Fly Bin has grubs already since the Q&A! It is a warm-season composting alternative (quickly turn any food waste in to chicken / fish feed). It will not yield much compost (only 5% of feedstock material will remain as castings) as most of the biomass is converted into grub biomass.

Books

Enjoy the talk? Take this survey to help us determine future sustainable landscaping classes.

The Solano Sustainable Backyards program and the talk are generously funded by the Solano County Water Agency.

Grilled Zucchini and Corn Salad

Photo: Unsplash

Ingredients:

1/3 cup extra-virgin olive oil
2 garlic cloves, minced
Salt and pepper, to taste
¼ t. red pepper flakes
2 ears sweet corn, husks and silk removed
3 zucchini (about 1 ½ lbs. total)
2 T. chopped fresh basil
4 t. fresh lemon juice
2 oz. feta cheese, crumbled (about ½ cup)

Whisk oil, garlic, ½ t. salt, ½ t. pepper and pepper flakes together in a large bowl. Brush corn with 1 T. oil mixture. Cut zucchini into planks that are 1/2” thick and toss with remaining oil mixture.

Start a grill (charcoal or gas) until hot. Clean the cooking grate. Place corn and zucchini on grill, and reserve any oil mixture remaining in the zucchini bowl. Grill, uncovered, turning corn every 2-3 minutes until kernels are lightly charred all over, 10-15 minutes. Zucchini will take about 4-8 minutes per side and should be browned but not mushy.

Transfer grilled vegetables to cutting board. Cut kernels from cobs. Cut zucchini on a bias into ½” thick slices. Add vegetables to bowl with reserved oil mixture. Add basil and lemon juice and toss to combine. Season with salt and pepper to taste. Transfer to a serving platter and sprinkle with feta cheese. Serve warm or at room temperature.

Serves 4

Recipe courtesy of Cooks Illustrated

Download a printable version of the recipe here.

Learn how to make this recipe by watching the cooking class below

Seasonal Sauces

Photo: Unsplash
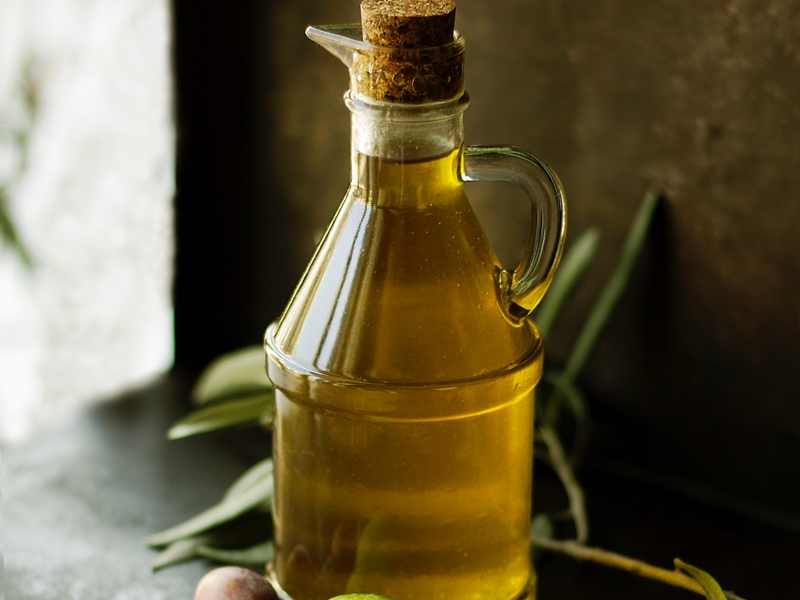
Use local olive oil to create these three sauce recipes: Honey “Citronette”, Italian Salsa Verde, and Moroccan Chermoula. Find Solano County olive oil here.

Honey “Citronette”

Ingredients:

¼ cup honey
¼ cup fresh lime juice
¼ t. finely grated orange zest
½ cup plus 2 T. extra-virgin olive oil
Salt & pepper, to taste
Assorted crudites (raw veggies, fruit) for serving

In a medium bowl, whisk the honey with the lime juice and orange zest. Gradually whisk in the oil and season with salt and pepper. Serve with crudites for dipping. Good options include: cucumbers, carrots, jicama, radishes, endive, pears and apples.

Serves about 8.

Recipe from Chef Kristofer Kalas, via Food & Wine.

Download a printable version of the recipe here

Italian Salsa Verde

Ingredients:

4 oil-packed anchovy fillets, soaked in cold water for 15 minutes and patted dry
¼ cup capers (if salt-packed, soak in cold water for 30-60 minutes and drain; otherwise rinse)
3 garlic cloves, coarsely chopped
½ cup chopped basil
½ cup chopped cilantro
½ cup chopped Italian flat-leaf parsley
½ cup chopped arugula
¼ t. crushed red pepper flakes
¼ cup chopped tarragon
¼ cup snipped chives
¼ cup chopped sage
1 cup extra-virgin olive oil (a robust, peppery oil works well)
Kosher salt, to taste

Pulse together the anchovies, capers and garlic in a food processor until finely chopped. Add all other ingredients and pulse to combine. Season with salt to taste. Serve with meat/veggies of your choice.

Makes 4 servings.

Download a printable version of the recipe here

Moroccan Chermoula Sauce

Ingredients:

¼ cup fresh lemon juice
2 cloves garlic, minced
½ t. cumin
½ t. paprika
2 pinches cayenne (or more, to taste)
½ t. salt
2/3 cup extra virgin olive oil
½ cup chopped cilantro

Mix together lemon juice, garlic, spices and salt in a small bowl. While whisking, drizzle in olive oil. Stir in chopped cilantro. Taste, adjust seasonings and serve.

Makes about 1 cup of sauce.

Chef’s Notes: Chermoula (also spelled “Charmoula”) is a simple sauce generally used to accompany fish and seafood in Moroccan, Algerian and Tunisian cooking. However, it is delicious on other meats or vegetables – try it on grilled summer squash, roasted potatoes, grilled chicken and more!


Download a printable version of the recipe here

Learn how to make these recipes by watching the cooking class below